Introduction to Building a Custom Closet Organizer
Are you struggling to keep your closet organized? A custom closet organizer can help you make the most of your space and keep everything tidy. While hiring a professional might be tempting, building your own custom closet organizer for less is an achievable and cost-effective solution. This article will guide you through the steps needed to create a functional and stylish closet organizer without breaking the bank.
Planning Your Custom Closet Organizer
Before diving into the construction process, thorough planning is essential. Here’s what you need to consider:
Assess Your Closet Space
Start by measuring your closet space. Note the height, width, and depth of the area you have to work with. This will help you design an organizer that fits perfectly.
Determine Your Storage Needs
Identify what you need to store. Are you looking to organize clothes, shoes, accessories, or a combination of everything? Knowing this will help you decide what type of storage solutions to incorporate, such as shelves, drawers, or hanging rods.
Create a Design
Draw a rough sketch of your closet showing where each component will be placed. There are many free online design tools that can help you visualize your custom closet organizer. Consider including adjustable shelves and rods to accommodate changes in your wardrobe over time.
Materials and Tools
Building a custom closet organizer requires some basic materials and tools. Here’s a list of what you’ll need:
Materials
- Plywood or MDF boards
- Brackets and shelf supports
- Hanging rods
- Drawer slides (if including drawers)
- Screws and nails
- Wood glue
- Paint or wood finish
Tools
- Measuring tape
- Circular saw or jigsaw
- Drill and drill bits
- Screwdriver
- Level
- Hammer
- Sandpaper
- Paintbrush or roller
Step-by-Step Construction
Once you have the design and materials ready, follow these steps for construction:
Cutting the Materials
Begin by cutting the plywood or MDF boards into the desired sizes for shelves, side panels, and any other components. Ensure your measurements are precise to avoid alignment issues later.
Assembling the Framework
First, assemble the side panels and attach them to the back panel if your design includes one. Use wood glue for added strength. Secure the panels with screws and reinforce with brackets if needed.
Installing Shelves and Rods
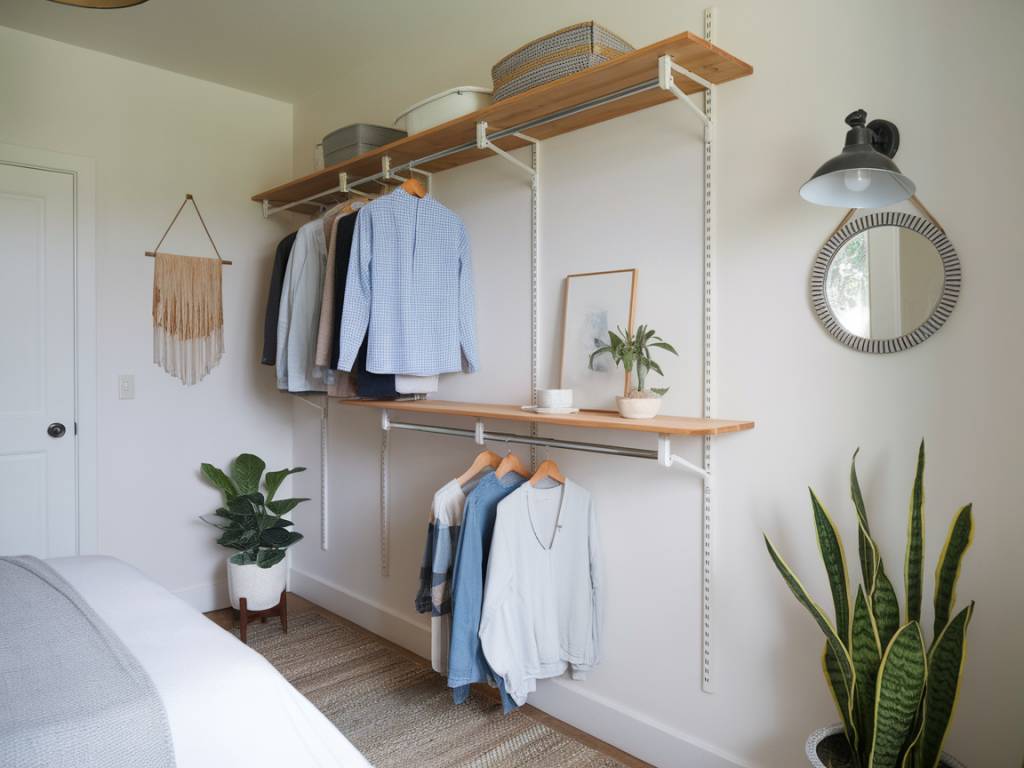
Install the shelves according to your design. Use shelf supports or brackets to secure them in place. Ensure they are level by using a spirit level. For hanging rods, attach rod brackets to the panels at the desired height and insert the rods.
Building and Installing Drawers
If your design includes drawers, assemble them separately and attach the drawer slides to both the drawers and the side panels. Make sure they glide smoothly before fully installing them. Drawers can provide additional storage for smaller items like accessories or undergarments.
Finishing Touches
After assembling the main structure, it’s time to add some finishing touches:
Sanding and Painting
Sand all wooden surfaces to smooth out any rough edges. This will also help the paint or finish adhere better. Apply primer if needed, then paint or stain the wood according to your preference. Allow adequate drying time between coats.
Organizing Your Closet
Once the paint is dry, you can start organizing your closet. Arrange your items in a manner that maximizes accessibility and makes the most of your new custom storage areas. Utilize storage bins, baskets, or dividers for smaller items to keep everything neatly sorted.
Cost-Saving Tips
Building a custom closet organizer doesn’t have to be expensive. Here are some tips to save money:
- Opt for MDF: Medium Density Fiberboard (MDF) is often cheaper than solid wood and works great for closet organizers.
- DIY Assembly: Putting everything together yourself can save you significant labor costs.
- Repurpose Old Furniture: Use parts from old furniture, such as shelves or drawers, to cut down on material costs.
- Watch for Sales: Keep an eye out for sales at your local hardware store to purchase materials at a discount.
Conclusion
By following these steps, you can build a custom closet organizer for less, tailored precisely to your storage needs. Not only will this project help you save money, but it will also provide a sense of accomplishment and a space that feels uniquely yours. Get started on your DIY custom closet organizer today and enjoy the benefits of a well-organized and clutter-free space.

