Concrete patios are a popular choice for outdoor living spaces due to their durability and low maintenance. However, over time, even the most resilient concrete surfaces can develop cracks. These cracks not only mar the aesthetic appeal of your patio but can also lead to more serious structural damage if left unattended. Fortunately, repairing a cracked concrete patio is a task that homeowners can accomplish over a weekend with the right materials and procedures. In this detailed guide, we’ll walk you through the steps on how to repair a cracked concrete patio.
Assessing the Damage
Before diving into the repair process, it is crucial to thoroughly assess the extent of the damage. Not all cracks are created equal, and the approach to repair may vary depending on the size and type of crack.
- Hairline Cracks: These are small, narrow cracks that typically do not signal significant structural issues.
- Minor Cracks: Slightly larger than hairline cracks, these may require a bit more attention but are generally manageable with DIY methods.
- Major Cracks: These are large, deep cracks that could indicate underlying issues. In some cases, professional intervention might be necessary.
Gathering the Materials and Tools
Repairing a cracked concrete patio will require certain materials and tools. Here’s a list of what you’ll need:
- Concrete cleaner
- Concrete patching compound
- Concrete resurfacer
- Patching trowel
- Wire brush
- Concrete bonding adhesive
- Garden hose or pressure washer
- Protective gear (goggles, gloves)
- Plastic sheeting or duct tape
- Water and bucket
Cleaning the Surface
Before you can fill in the cracks, it’s important to thoroughly clean the surface to ensure proper adhesion of the filling materials. Follow these steps:
- Start by removing any loose debris or dirt from the cracks using a wire brush.
- Use a garden hose or pressure washer to wash away any remaining dust and debris.
- Allow the area to dry completely before proceeding to the next step.
Preparing the Cracks
Once the patio surface is clean and dry, the next step is to prepare the cracks for filling:
- If the crack is more than a quarter inch deep, use a chisel to widen it. This will help the patching compound adhere better.
- Rinse the crack again with water to remove any additional debris that may have fallen in during chiseling.
- Apply a concrete bonding adhesive inside the crack to promote better bonding between the existing concrete and the patching material.
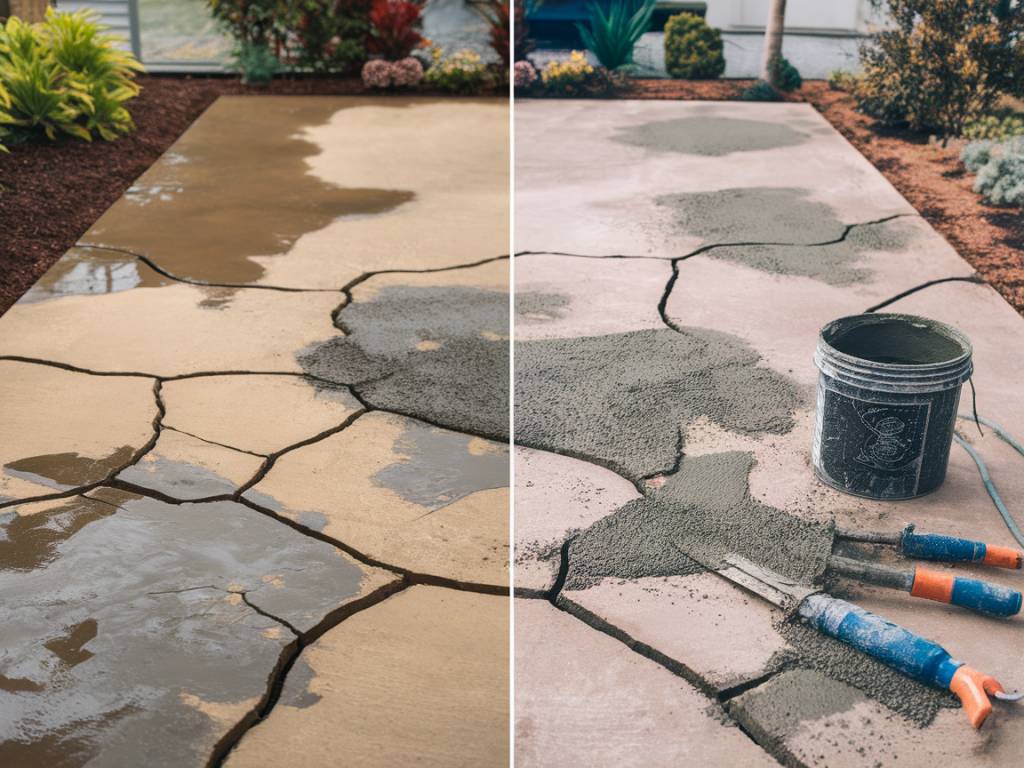
Filling the Cracks
With the crack properly prepared, you can now proceed to fill it:
- Mix the concrete patching compound according to the manufacturer’s instructions. It’s essential to get the right consistency for effective application.
- Use a patching trowel to fill the crack, pressing the compound firmly into the space.
- Smooth out the surface of the patch with the trowel to ensure it is level with the surrounding concrete.
- Allow the patch to dry completely as per the manufacturer’s directions, typically around 24 hours.
Applying the Resurfacer
To give your patio a consistent and polished look, consider applying a concrete resurfacer over the entire area:
- Mix the concrete resurfacer in a bucket, making sure it reaches a smooth, spreadable consistency.
- Pour the resurfacer onto the patio and use a long-handled squeegee to spread it evenly across the surface.
- For a non-slip finish, use a broom to create texture by lightly dragging it over the wet resurfacer.
- Allow the resurfacer to dry according to the manufacturer’s instructions. Often, this will require allowing it to cure for a few days before placing furniture back on the patio.
Sealing the Surface
To enhance the longevity of your repair work and protect your patio from future damage, sealing the surface is a wise step:
- Choose a high-quality concrete sealer appropriate for outdoor use.
- Apply the sealer evenly across the entire patio surface with a roller or sprayer.
- Allow the sealer to dry completely before using the patio. This usually takes around 24-48 hours, depending on the product used.
Maintaining Your Repaired Patio
After going through the effort to repair your cracked concrete patio, regular maintenance can help keep it looking great and prevent future damage:
- Regularly sweep and clean the patio to remove debris and dirt.
- Reapply the concrete sealer every 1-2 years to maintain its protective layer.
- Inspect the patio periodically for new cracks or damage and address them promptly.
By following these detailed steps, you can repair a cracked concrete patio over a weekend and enjoy a revitalized outdoor space. Not only will this improve the appearance of your patio, but it can also extend its lifespan, providing you with a safe and attractive area to enjoy for years to come.