Building a DIY raised garden bed can be a great way to maximize growing space in small areas, whether you live in an urban environment or simply have a compact backyard. Raised garden beds offer numerous benefits, including better soil control, improved drainage, and easier access for planting and maintaining your crops. In this guide, we will explore how to build a DIY raised garden bed for small spaces, providing detailed steps and useful tips to help you get started.
Benefits of Raised Garden Beds
Raised garden beds are an excellent addition to any small space garden. Here are a few reasons why you might want to consider building one:
- Soil Control: You have complete control over the soil quality, which is essential for growing healthy plants.
- Improved Drainage: Elevated beds provide better drainage, which helps prevent waterlogged soil and root rot.
- Ease of Access: Raised beds reduce the need for bending over, making gardening more comfortable for people with limited mobility.
- Extended Growing Season: The soil in raised beds warms up faster in the spring, allowing you to plant earlier.
- Weed and Pest Control: It is easier to manage weeds and pests in a contained environment.
Materials Needed for a DIY Raised Garden Bed
Before you begin building your raised garden bed, gather the following materials:
- Measuring tape
- Saw (if cutting wood yourself)
- Screwdriver or drill
- Wood screws or nails
- Level
- Landscape fabric
- Soil and compost
Wood Selection: When choosing wood, opt for untreated cedar or redwood, as they are naturally resistant to rot and insects. Avoid using treated wood, as it can leach harmful chemicals into your soil.
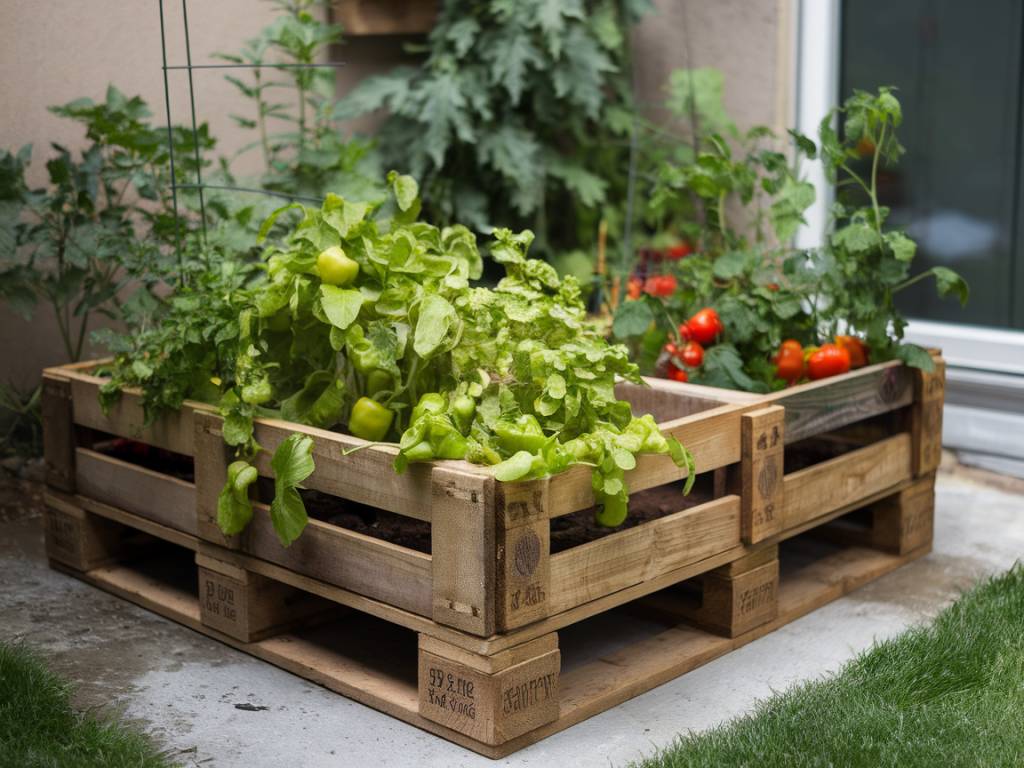
Step-by-Step Guide to Building a DIY Raised Garden Bed
1. Determine the Size and Location
Begin by deciding the dimensions of your raised garden bed. A common size for small areas is 4 feet by 4 feet, but you can adjust the size based on your available space and needs. Ensure the location gets at least 6-8 hours of sunlight per day and has good drainage.
2. Prepare the Ground
Clear the area where you plan to place your raised bed. Remove any grass, rocks, or debris to create a leveled surface. This will provide a stable foundation for your garden bed.
3. Cut the Wood
Measure and cut your wood to the desired lengths. For a 4×4 bed, you will need two pieces cut to 4 feet for the sides and two pieces cut to 4 feet for the ends. Make sure to double-check your measurements before cutting.
4. Assemble the Frame
Lay out the wood pieces on the ground to form a rectangle. Use wood screws or nails to attach the pieces at the corners, creating a sturdy frame. Ensure the corners are square by using a level and making any necessary adjustments.
5. Add a Support (Optional)
If your raised bed is longer than 4 feet, consider adding a middle support beam to prevent the sides from bowing outward. This step is optional but recommended for larger beds.
6. Line the Bottom with Landscape Fabric
Line the bottom of the raised bed with landscape fabric. This will help prevent weeds from growing up through the soil while allowing for proper drainage. Secure the fabric with staples or by tucking it under the frame.
7. Fill with Soil and Compost
Fill the raised bed with a mixture of soil and compost. A good ratio is 60% topsoil to 40% compost, which provides a nutrient-rich environment for your plants. You can also add other soil amendments based on the specific needs of your plants.
8. Plant Your Garden
Once the bed is filled with soil, you are ready to start planting. Choose plants that are suitable for your climate and the amount of sunlight your garden bed will receive. Consider planting a mix of vegetables, herbs, and flowers for a diverse and productive garden.
Maintaining Your Raised Garden Bed
Maintaining a raised garden bed requires some ongoing care and attention. Here are a few tips to keep your garden thriving:
- Watering: Raised beds can dry out more quickly than traditional gardens. Regularly check soil moisture and water as needed, especially during hot, dry periods.
- Weeding: While raised beds help reduce weed growth, they are not entirely weed-proof. Pull weeds as soon as you spot them to prevent them from taking over your garden.
- Mulching: Applying a layer of mulch around your plants can help retain soil moisture, regulate temperature, and reduce weed growth.
- Fertilizing: Periodically add organic fertilizers or compost to replenish soil nutrients and support plant growth.
- Pruning: Keep your plants healthy by pruning dead or diseased foliage and encouraging proper air circulation.
Additional Tips for Small Space Gardeners
Maximizing your gardening efforts in small spaces requires some creative thinking and smart practices. Here are additional tips to help you get the most out of your raised garden bed:
- Vertical Gardening: Use trellises, stakes, or cages to grow climbing plants like tomatoes, beans, and cucumbers vertically. This technique saves space and can increase yield.
- Succession Planting: Plan for multiple planting cycles throughout the growing season. Succession planting allows you to harvest more frequently and make the most of your space.
- Companion Planting: Pair compatible plants together to enhance growth, deter pests, and improve soil health. For example, plant basil alongside tomatoes or marigolds with vegetables to repel harmful insects.
- Container Gardening: Supplement your raised bed with container gardens. Pots, grow bags, and hanging baskets can extend your growing area and allow for greater plant variety.
By following these steps and tips, you can create a thriving raised garden bed in even the smallest spaces. Whether you’re a seasoned gardener or just starting, the benefits of raised garden beds can help you grow fresh, healthy produce right in your own home. Remember to choose the right location, use quality materials, and maintain your garden with care to enjoy a bountiful harvest throughout the growing season.